As my eldest daughter's ("R") 2nd birthday was approaching in May 2012, we were looking at Doll's houses for her.
I never realised how much children's toys cost! Wow!
I said to my wife, I think I would prefer to build R. a Doll's House (this was somewhat due to the cost, but also, I thought it would have more meaning for her).
Well, that was almost a year ago now. I really wanted to do it for Christmas last year, but that came and went and no timber had been touched.
But wait... After joining my local Men's Shed finally I had the tools and resources to take on this project.
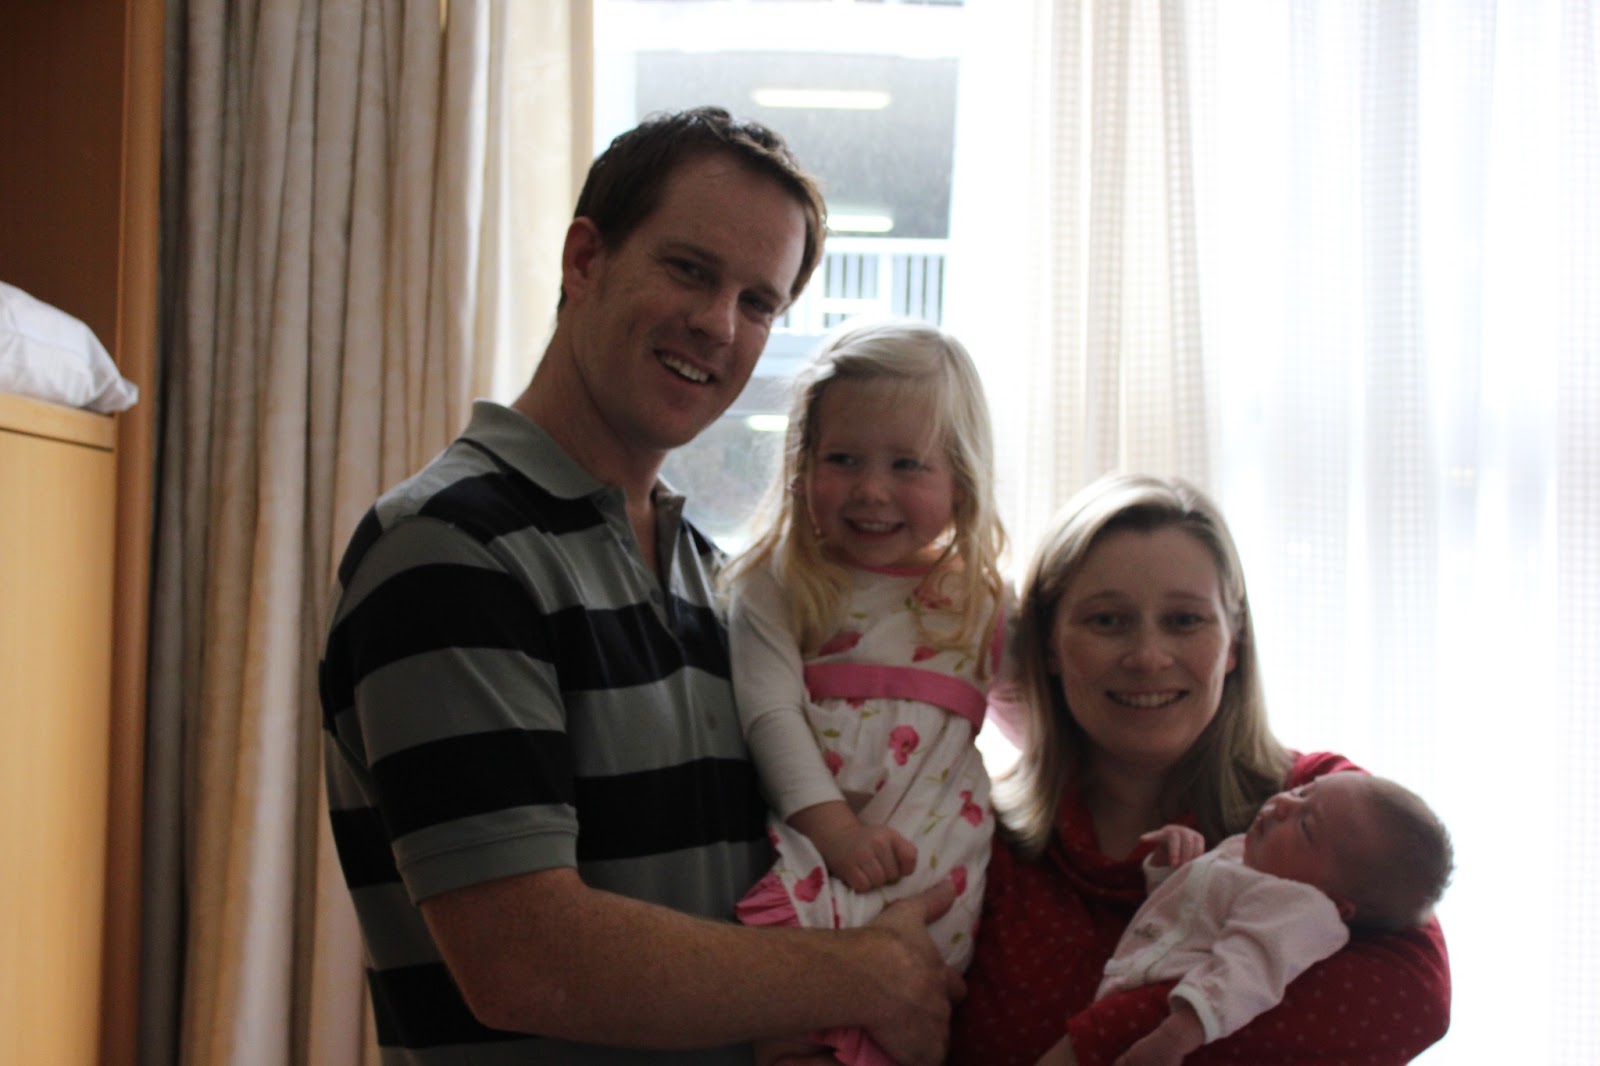
So here we are. I am really happy with the finished project, and when I give it to R. for her 3rd birthday, I hope she is too - I'll let you know!
Here is the finished Product!

I researched dolls houses quite a bit before finding this design on another blog (Sarah's Serendipity). Measurements at this site are in inches, etc. So I converted this into metric measurements and redesigned a few of the features.
I really liked the open design and simplicity of the House where friends could easily play together and have open access to the House.
Constructed out of a pine board, I was tossing up between staining the final product or just a clear varnish. The clear varnish was used in the end to give a light and natural look to the house, and I am very happy with it!
Building the Timber Doll's House
Materials: (note: all measurements are in 'mm')
- All the pieces of the House were cut from 3 pieces of 1800 x 300 x 20mm (available from Bunnings Warehouse)
- Sandpaper
- Wood screws (40mm #10 screws)
- Drill bits (one to drill pilot holes; a second 3/8" bit to countersink the screws)
- 9.5mm Wooden "cover buttons"(I used rounded head ones to make a bit of a feature out of them) These wooden buttons were the hardest material to track down as not many hardware stores sell wooden ones anymore, they are usually plastic now. I eventually found them in a small local hardware store!
- Wood glue
- Clear Varnish
- Paint brush
Tools Used:
- Mitre Slide Saw
- Jigsaw
- Drill Press
- Hand Drill
- Wood Plane
Plans
The plans I ended up with for the dolls house can be downloaded below
Instructions
- Using the mitre-slide saw, cut out all the required pieces:
- Ground/1st/2nd story floors - 600 x 300 x 20mm
- front and back of house - 750 x 300 x 20mm
- Roof - 638 x 203 x 20mm
- Stairs - 280 x 230 x 20mm
- Ground floor archway - 260 x 300 x 20mm
- 1st floor archway - 248 x 300 x 20mm
- I then took off all the sharp edges on the sides using a wood plane.
- Measure and draw the detail needed on each of the timber parts:
- The roof apex at the top of the front wall and back wall creates a right angle leaving the angled part of the roof to be ~212mm (while the vertical height of the roof will be 150mm);
- Working on the front wall still, draw the detail of the doors and windows as laid out on the plans (see below), while the back wall just needs to window on the 1st floor:
- one door 100mm (wide) x 200mm(tall), including an arched top which is 40mm tall;
- two small ground floor windows either side of the door (60mm x 40mm with rounded tops and bottoms);
- one large square window on the 1st floor (100x100mm)
- The 1st floor just needs a section cut out for the stairs to come out. (Note: the back edge of the top stair should sit flush with the back of this cut out section. This leaves the cutout 70mm in from the edge and I made it a square of 76.2mm. All other floors stay as a lane rectangle.
- The archways - this was a bit of a 'make-up-as-I-went' kind of design. Both arches begin around 50mm in from the edges and leave 50mm above the apex. The actual arch was then hand drawn to create a smooth rounded arch on the ground floor and a more pointed arch on the 1st floor.
- The reason the arches are different heights is to make the floors different levels. Standard homes will normally have a taler ceiling on the ground floor and a slightly lower one on the subsequent floors. (I should note that I had to reverse this during construction due to a measurement error when drilling the holes for the floor. So it has ended up actually having a lower ceiling on the ground floor - oops)
- The stairs... yes the stairs... A bit fiddley really. Each stair has a fall (height) of 31.4mm and a step (or width) of 25.5mm. This will leave 9 stairs in total.
- Finally, the roof - I gave the roof a 'waved' design rather than a straight bottom edge and left the other side of the house open for better play
- Cutting out the detailed parts.
- I used the mitre-slide saw for the angled roof on the front and back panal;
- For the windows and doors I drilled large pilot holes on a drill press before using a jigsaw to complete the cuts.
Below is a picture half-way through the above process.

5. Let the sanding begin. How long do you spend sanding timber down... this process took a few sessions. I am always surprised at how long it takes to properly sand timber for a project such as this one:
- remove the pencil marks (essential);
- sand down the previously planed edges (essential) including all the windows and doors, etc.
- sand down each panel to make it smooth (you can decide how much)
6. Now I was ready for the construction to begin. Make sure you measure each drill hole twice before putting drill bit to timber:

- At each joint between floor an wall, I used 4 screws (two on each side) - the first 25mm, then 50mm in from each edge.
- A pilot hole was drilled and the using the 3/8" drill bit to countersink the screw head and make room for the wooden screw cap.
- The base was first attached to the front and rear panels, following by the lower arch screwed into the base and then the 1st floor was added so the it sat 260mm off the ground floor, an was screwed into the front and back panels followed by the lower archway.
- I then attached the roof as the walls were starting to skew slightly, and this pulled them back into alignment and made the attachment of the 2nd floor a lot easier. Three (3) screws, evenly spaced, were used on each side of the roof.
- the upper archway was screwed onto the floor below it (slightly off centre with the one below), and the 2nd floor was attached in the same manner as the first.
- Finally, the little wooden screw caps were glued into place over the screws.

7. After more, and more, sanding... I put three coats of clear varnish on the dolls house and sanded in between each coat with a wet and dry sand paper to create a nice smooth, natural look to the timber.
All up, I was really happy with how the whole house turned out. Yes I could have spent more time carefully cutting out the detail in the windows, doors and arches, but this was time I didn't really have. And above all things, the smile on my little girls face on her birthday made it all worthwhile.

 Oh, I should also say... furniture. At one stage I was thinking of making some furniture. But in the end we bought a fantastic set (and a very extensive set) off ebay. It looks brand new and was only $26!
I would love to hear you comments!
Stay tuned for more projects soon (hopefully)